Thought this might be useful for somebody. This is assuming that you have already run through this post to get the initial setup done: ServiceNow – ChatGPT Integration.
This is a very basic configuration and it may be better to do it through a flow, but as an example of how you could potentially update a task (incident in this case) and provide recommendations from ChatGPT when the description is updated. This is a fairly flexible approach so you might have other ideas!
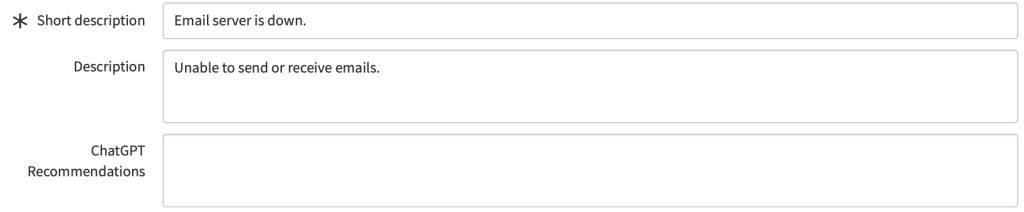
Firstly, open up the incident table. We are going to create a new column called “ChatGPT Recommendations”. Give this column the type of “String” and a max length of 2000. Copy the column name (should be u_chatgpt_recommendations) and submit.
Open the incident form and make sure the new column is showing on the form.
We will now create a business rule to deliver the result. Configure the business rule conditions as follows:
Name:
Set recommendations based on description
Table:
Incident
Advanced:
true (checked)
When to run
When:
before
Insert:
true (checked)
Update:
true (checked)
Short description:
changes
Now on the advanced tab we will enter the following code:
(function executeRule(current, previous /*null when async*/ ) {

    // Create an instance of the ChatGPT class
    var chatGPT = new global.ChatGPT();

    // Set the premise for the chat with the assistant. The premise helps set the context of the conversation.
    var premise = chatGPT.setPremise("You are an IT professional providing recommendations to non-technical users. You should give the recommendations only, no pretext.");

    // Create a message requesting ChatGPT to send some recommendations.
    var message1 = chatGPT.createMessage("user", "Provide some recommendations for this: " + current.description);

    // Submit the chat to the GPT-3.5 Turbo model (default). The chat consists of the premise and the user's request.
    // The 'submitChat' function accepts an array of messages which form a conversation.
    var result = chatGPT.submitChat([premise, message1]);

    // Extract only the response from the message.
    var extracted_message = chatGPT.extractAssistantMessage(result);

	// Populate our new field.
    current.u_chatgpt_recommendations = extracted_message;

})(current, previous);
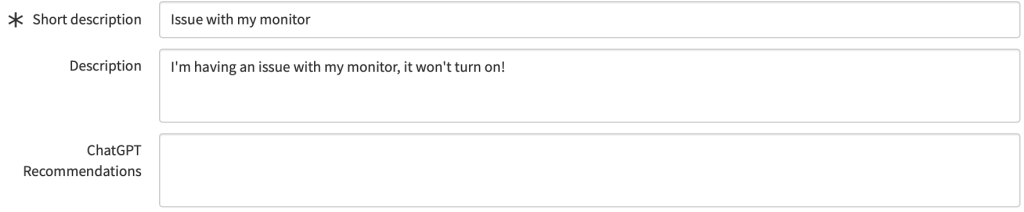
Once submitted, we should be good to go! As an example, I logged a new incident about my monitor being broken. The system showed the following:
ServiceNow have just started offering some tools for ChatGPT integration. Some of these fall under their IntegrationHub Pro offering. Its well worth checking out the new official options in my opinion.
I thought I would try to setup my own integration with ChatGPT on a personal instance a while ago and just got round to it. I thought I’d document the process here for if anyone was interested.
I’ll write a few of these articles as there was an idea that I had which I thought might be useful. What I am trying to achieve is the ability to ask ChatGPT to write a script, then have ServiceNow create the script on the platform.
As an FYI, the key is separate from any ChatGPT plus subscription you might have – it will likely come under a new billing process. Once you have created the key, note it down and continue on with creating a REST message.
Create a new REST Message
In ServiceNow, open “REST Message” under System Web Services.
Create a new REST message. Enter the following details:
Open the “HTTP Request” tab. Create two new HTTP headers as follows:
Name
Value
Example
Authorization
Bearer [API Key]
Bearer sk-xyzxxxxxxxxxxx
Content-Type
application/json
Create a new “HTTP Method” with the following details. You can delete the default GET.
Name
Http Method
Endpoint
POST
POST
https://api.openai.com/v1/chat/completions
You should now have the bones in place to send the messages, now we need to write some code to submit the requests.
Create Script Include
We will now create a Script Include that can be used to process ChatGPT requests. Below is the initial code I have used.
Name
API Name (automatically generated)
ChatGPT
global.ChatGPT
var ChatGPT = Class.create();
ChatGPT.prototype = {
    initialize: function() {
        this.model = "gpt-3.5-turbo";
        // Uncomment the following line if you want to use "gpt-4" model
        // this.model = "gpt-4"; // Note: There is a waitlist for this.

        gs.info("ChatGPT instance created with model: " + this.model, "ChatGPT");
    },

    // Sets the premise for the chat
    setPremise: function(premise) {
        gs.info("Setting premise: " + premise, "ChatGPT");
        return this.createMessage("system", premise);
    },

    // Creates a message object with role and content
    createMessage: function(role, content) {
        gs.info("Creating message with role: " + role + " and content: " + content, "ChatGPT");
        return {
            "role": role,
            "content": content
        };
    },

    // Submits chat messages to the model applied in this script include
    submitChat: function(messages) {
        gs.info("Submitting chat messages: " + JSON.stringify(messages), "ChatGPT");

        try {
            // Create a new GlideHTTPRequest instance and set the endpoint URL
            var request = new sn_ws.RESTMessageV2("ChatGPT", "POST");
            request.setHttpMethod('POST');

            // Set the payload including model, messages, and temperature
            var payload = {
                "model": this.model,
                "messages": messages,
                "temperature": 0.7
            };

            // Log the payload for debugging purposes
            gs.info("Payload: " + JSON.stringify(payload), "ChatGPT");

            // Set the request body
            request.setRequestBody(JSON.stringify(payload));

            // Send the request
            var response = request.execute();

            // Get the response status and content type
            var httpResponseStatus = response.getStatusCode();
            var httpResponseContentType = response.getHeader('Content-Type');

            // If the request is successful and the content type is JSON
            if (httpResponseStatus === 200 && httpResponseContentType === 'application/json') {
                gs.info("ChatGPT API call was successful", "ChatGPT");
                return response.getBody();
            } else {
                gs.error('Error calling the ChatGPT API. HTTP Status: ' + httpResponseStatus, "ChatGPT");
            }
        } catch (ex) {
            // Log any exception that happens during the API call
            var exception_message = ex.getMessage();
            gs.error(exception_message, "ChatGPT");
        }
    },

    type: 'ChatGPT'
};
A bit around the functions:
Function
Notes
setPremise
Can be used to set the premise of a conversation. For example, you could want ChatGPT to reply in a certain style, or in a certain format. The premise could be something like, “You are speaking to a non-technical user so any answers should be summarised for that audience”.
createMessage
Used to create the message you are about to send, with two variables; role and content. Generally this is to aid with conversational context which I’ll talk about in future. To use it, call the function with the role as “user” and the content as the message you want to sent.
submitChat
This function sends the message to the ChatGPT endpoint using the REST message we defined earlier. It takes an array of messages, so you can use the createMessage function and send that though, or use the setPremise function initially to set the premise of the chat and send a message after etc.
Testing the code
To test if the code works, you can create a fix script. Here is an example that sets the premise that ChatGPT is a comedian and we can ask for its thoughts on rainy weather.
// Create an instance of the ChatGPT class
var chatGPT = new global.ChatGPT();

// Set the premise for the chat with the assistant. The premise helps set the context of the conversation
var premise = chatGPT.setPremise("You are a comedian and you love to make people laugh. Your responses should be comedic");

// Create a user message asking the assistant to write a ServiceNow fix script to query for active users.
var message1 = chatGPT.createMessage("user", "What do you think about rainy weather?");

// Submit the chat to the GPT-3.5 Turbo model (default). The chat consists of the premise and the user's request.
// The 'submitChat' function accepts an array of messages which form a conversation.
var result = chatGPT.submitChat([premise, message1]);

// Print the result. This will be a JSON object as per the premise set for the chat.
gs.print(result);
You should have a payload like this:
{
    "model": "gpt-3.5-turbo",
    "messages":
    [
        {
            "role": "system",
            "content": "You are a comedian and you love to make people laugh. Your responses should be comedic"
        },
        {
            "role": "user",
            "content": "What do you think about rainy weather?"
        }
    ],
    "temperature": 0.7
}
You should get a response like this:
{
  "id": "chatcmpl-XXXXXXXXXXXXXXXX",
  "object": "chat.completion",
  "created": 1686498256,
  "model": "gpt-3.5-turbo-0301",
  "usage": {
    "prompt_tokens": 38,
    "completion_tokens": 56,
    "total_tokens": 94
  },
  "choices": [
    {
      "message": {
        "role": "assistant",
        "content": "Rainy weather? Oh, it's the perfect time to stay curled up in bed all day and pretend like you have a life. Plus, it's the only time you can use the excuse \"sorry, can't go out, it's raining\" to avoid social situations."
      },
      "finish_reason": "stop",
      "index": 0
    }
  ]
}
As you can see, ChatGPT sent a message back with the role of “assistant”. I hope this helps! I’ll be writing more articles around this with an aim to get the automatic code deployment working.